Settings
allow_scale_larger
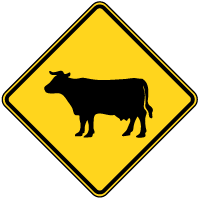
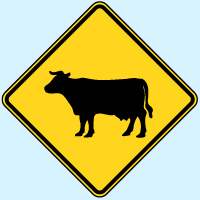
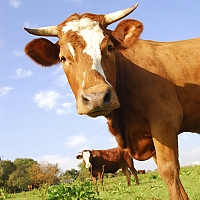
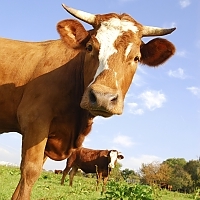
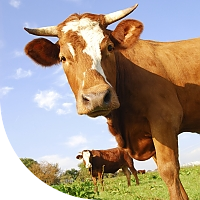
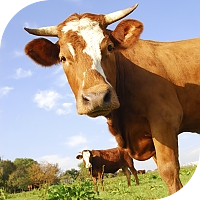
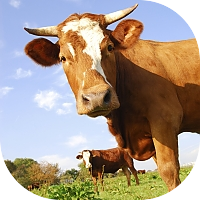
Sometimes you may want an image to scale larger to fill a certain area, however, an image will not stretch larger than its original dimensions by default. This setting allows the image to stretch to auto fit within the dimensions you specify, while still maintaining its aspect ratio.
- $boolean (bool)
In the example below, the image on the left is at its full size, and the image on the right is scaled larger to fit within a max width and height of 300px.

array(
'max' => 300,
'allow_scale_larger' => TRUE
)
);
echo $ce_image->create_original_tag(); //original
echo $ce_image->create_tag(); //made
$ce_image->close();
auto_cache
When set, the auto_cache setting will create a cache directory in the directory of the source image. The manipulated images will then be cached in this directory, and not the directory specified by the cache_dir setting.
- $directory_name (string): The name of the directory to be generated in each source directory to hold the cached images.
If the source_directory is below web root, then the auto_cache directory will be created in the directory specified by the cache_dir setting, so that the manipulated image can still be accessible from the browser. For this reason, it is advisable that this setting not be specified if you are pulling the images from below web root.
default relative path:
/images/made/images/example/cow-sign_100_100.png
auto_cache relative path:
/images/example/thumbs/cow-sign_100_100.png
$ce_image->make( '/images/example/cow-sign.png',
array(
'max' => 100
)
);
echo '<b>default relative path</b>:<br>' . $ce_image->get_relative_path();
$ce_image->close();
echo '<br><br>';
//auto_cache behavior
$ce_image->make( '/images/example/cow-sign.png',
array(
'max' => 100,
'auto_cache' => 'thumbs'
)
);
echo '<b>auto_cache relative path</b>:<br>' . $ce_image->get_relative_path();
$ce_image->close();
base
The base path for CE Image to use. By default, the $_SERVER['DOCUMENT_ROOT'] is used. This setting allows you to override that value.
- $value (string): The full server path to the directory you want to use as the base (think document root) of your site. If left blank (''), the $_SERVER['DOCUMENT_ROOT'] evnironment variable is used.
If your $_SERVER['DOCUMENT_ROOT'] is set correctly, you probably will not need to change this. However, if you have some kind of special setup, this setting is both useful and important.
bg_color
The background fill color as a hexadecimal value. Leave blank or not specified for transparency (if a png or gif), or to default to the bg_color_defualt if a jpeg.
- $color (string): The color can be a 3 or 6 digit hexadecimal (with or without the #), or '' (default).
If the manipulated image is very large (2000px by 2000px or greater), you will need to increase your memory limit setting to greater than 64 (Megasytes) in order to avoid memory errors.
In the example below, the png image is saved with a background color of #d6f3ff.
array(
'bg_color' => '#d6f3ff'
)
);
echo $ce_image->create_tag();
$ce_image->close();
bg_color_default
The default background fill color to be used, in the form of a hexadecimal value. By default, PHP will convert transparency to black pixels. So, for example, if you are saving a mostly transparent png image to jpg format, the transparent pixels would end up appearing black. CE Image already changes that default to white (#ffffff), and this setting allows you to override that default to the color value of your choice.
- $color (string): The color can be a 3 or 6 digit hexadecimal (with or without the #), and defaults to 'ffffff' if not specified.
This setting is particularly useful if you want to apply filters to a png image that will be saved as a jpg, as it allows you apply the filters to the png image *before* the background color is applied.


$ce_image->make( '/images/example/cow-sign.png',
array(
'save_type' => 'jpg',
'filters' => 'grayscale'
)
);
echo $ce_image->create_tag();
$ce_image->close();
//background color applied before filters
$ce_image->make( '/images/example/cow-sign.png',
array(
'save_type' => 'jpg',
'filters' => 'grayscale',
'bg_color' => '#d6f3ff'
)
);
echo $ce_image->create_tag();
$ce_image->close();
//default background color applied after filters
$ce_image->make( '/images/example/cow-sign.png',
array(
'save_type' => 'jpg',
'filters' => 'grayscale',
'bg_color_default' => '#d6f3ff'
)
);
echo $ce_image->create_tag();
$ce_image->close();
border
This setting allows you to create a solid color border around your image. If you are using this setting in combination with rounded_corners=, the borders will be antialiased, to give a nice smooth appearance.
- $thickness (int): The border thickness in pixels. Defaults to 0.
- $color (string): The color can be a 3 or 6 digit hexadecimal (with or without the #), and defaults to 'ffffff' if not specified.
Note: Like borders applied with CSS, the border is created on the outer edge of the image (as opposed to an inner border). If you have a 100px by 100px image for example, with a border-width of 10 passed in, your final image dimensions would be 120px by 120px.

$ce_image->make( '/images/example/cow_square.jpg',
array(
'border' => array( 5, '4a2d14' )
)
);
echo $ce_image->create_tag() . ' ';
$ce_image->close();
//border with rounded corners, saved to png format for transparency
$ce_image->make( '/images/example/cow_square.jpg',
array(
'border' => array( 5, '4a2d14' ),
'rounded_corners' => array(
array( 'br', 50 ),
array( 'tl', 50 )
),
'save_type' => 'png'
)
);
echo $ce_image->create_tag();
$ce_image->close();
bucket
Pass in the name of the Amazon S3 bucket you would like the manipulated image(s) to be saved to.
- $bucket_name (string): The name of the Amazon S3 bucket.
You will also need to specify your Amazon key and secret key, and optionally set the request headers.
Note: You should always use caching when using Amazon S3 with CE Image, so that the class does not have to check if the manipulated image exists in the cloud on every page load (please view the performance page for more details).

Amazon S3 URL: http://causingeffect.s3.amazonaws.com/images/made/images/example/cow_square_200_200.jpg
array(
'bucket' => 'causingeffect',
'aws_key' => 'YOURKEY',
'aws_secret_key' => 'yOUr+sEcrEt-KeY',
'aws_request_headers' => array(
'Cache-Control' => 'max-age=' . (30 * 24 * 60 * 60),
'Expires' => gmdate("D, d M Y H:i:s T", strtotime('+1 month') )
)
)
);
echo $ce_image->create_tag() . '<br>';
echo '<b>Amazon S3 URL</b>: ' . $ce_image->get_s3_url();
$ce_image->close();
cache_dir
This setting allows you to specify the cache directory for your manipulated images, relative to your document root. Defaults to '/images/made/').
- $directory_name (string): The cache directory.
In the below example, the file is cached in the directory /images/php/other/ instead of the current location /images/php/:
relative path:
/images/made/images/example/cow-sign_100_100.png
relative path:
/images/php/other/images/example/cow-sign_100_100.png
$ce_image->make( '/images/example/cow-sign.png',
array(
'max' => 100
)
);
echo '<b>default relative path</b>:<br>' . $ce_image->get_relative_path();
$ce_image->close();
echo '<br><br>';
//auto_cache behavior
$ce_image->make( '/images/example/cow-sign.png',
array(
'max' => 100,
'auto_cache' => 'thumbs'
)
);
echo '<b>auto_cache relative path</b>:<br>' . $ce_image->get_relative_path();
$ce_image->close();
crop
Determines whether the image will just be resized or cropped. If the crop is to take effect, both the width and height settings (or one of their aliases, including the max setting) need to be specified (and greater than 0).
$do_crop = FALSE,
$position = array( 'center', 'center' ),
$offset = array( 0, 0 ),
$smart_scale = TRUE
);
)
- $do_crop (bool): Whether or not to crop the image.
- $position (array): This can be specified as a pair of positions in the form of horizontal_position_string,vertical_position_string. The accepted values for the horizontal position string are: 'left', 'center', or 'right'. The accepted values for the vertical position string are: 'top', 'center', or 'bottom'.
- $offset (array): The amount of pixels to offset the image after it is positioned in the form offset_x,offset_y, where offset_x and offset_y are integers.
- $smart_scale (bool): When smart_scale is enabled, the image is scaled to best fit in the specified dimensions. If set to false, the image is not scaled at all. This can also be helpful if you want to focus in on a particular area of an image without scaling it.
Note: Like a CSS background image, if an image is offset too far in one direction, you may see less of it.
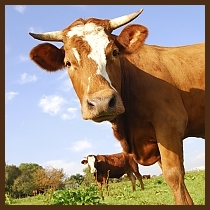
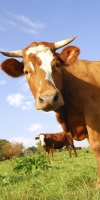
In this example, the first image uses the default cropping, and the second image uses the offset to home in on the cow’s head.


$ce_image->make( '/images/example/cow.jpg',
array(
'width' => 200,
'height' => 130,
'crop' => TRUE
)
);
echo $ce_image->create_tag() . ' ';
$ce_image->close();
//offset
$ce_image->make( '/images/example/cow.jpg',
array(
'width' => 200,
'height' => 130,
'crop' => array(
TRUE,
array('center','center'),
array(0,40)
)
)
);
echo $ce_image->create_tag();
$ce_image->close();
This example shows three images that are positioned and offset differently.


$ce_image->make( '/images/example/cow.jpg',
array(
'width' => 100,
'height' => 200,
'crop' => array(
TRUE,
array('left','top'),
array(-4,0)
)
)
);
echo $ce_image->create_tag() . ' ';
$ce_image->close();
//default
$ce_image->make( '/images/example/cow.jpg',
array(
'width' => 100,
'height' => 200,
'crop' => array( TRUE )
)
);
echo $ce_image->create_tag() . ' ';
$ce_image->close();
//right
$ce_image->make( '/images/example/cow.jpg',
array(
'width' => 100,
'height' => 200,
'crop' => array(
TRUE,
array('right','top'),
array(4,0)
)
)
);
echo $ce_image->create_tag();
$ce_image->close();
The following example exhibits the ability to crop and position images. The image is first cropped to a 300px by 300px square. The image is then cropped into 9 “slices” and the results are output.


$ce_image->make( '/images/example/cow.jpg',
array(
'max' => 300,
'crop' => TRUE,
'filter' => 'sharpen'
)
);
//get the new image's relative path
$relative = $ce_image->get_relative_path();
$ce_image->close();
//----- break the new image into pieces -----
//possible positions
$horizontal = array( 'left', 'center', 'right' );
$vertical = array( 'top', 'center', 'bottom' );
for ($i = 0; $i < 9; $i++ )
{
//figure out the positions
$h = $i % 3;
$v = 0;
if ( $i > 5 )
{
$v = 2;
}
else if ( $i > 2 )
{
$v = 1;
}
//crop the image
$ce_image->make( $relative,
array(
'max' => 100,
'crop' => array(
TRUE,
array($horizontal[$h],$vertical[$v]),
array(0,0),
FALSE
)
)
);
//echo the tag
echo $ce_image->create_tag() . ' ';
//echo the break tag
if ( $h == 2 )
{
echo '<br>';
}
//close the image
$ce_image->close();
}
dir_permissions
The mode (permission level) to try and set the created directories to.
- $value (int): Must be octal. See http://php.net/manual/en/function.chmod.php for more info. Defaults to: 0775
disable_xss_check
When you download images from other domains, CE Image runs the images through an XSS filter. Sometimes the filter may flag your image as malicious, even when you know it is not. You should only enable this setting (disable the filter) if you know and trust the source of the remote images you are downloading (for example, downloading your images from your Amazon S3 bucket).
- $boolean (bool): Whether or not to disable the XSS check.
If your images fail the XSS filter, a debug message will be logged in your debug messages. You can call the get_debug_messages to check if an image failed.
fallback_src
Sometimes you may want to specify a fallback image. For example, if you are showing thumbnails of the photos for different users on your site, and some of the users are missing photos, you could designate a default photo to replace the missing photos (probably one of those unisex silhouette images) via the fallback_src setting.
- $source (string|resource): The image source. Can be a relative path to document root, a full server (absolute) path, a URL (remote or local), an HTML snippet, or a GD2 image resource.
In the example below, the source image does not exist, so the fallback_src is used.
array(
'fallback_src' => '/images/example/cow_square.jpg'
)
);
echo $ce_image->create_tag();
$ce_image->close();
filename
The filename you would like the image saved as. By default, the filename of the source image is used.
- $name (string): The name you want the file set to, excluding the extension.
In the below example, the original image (cow_square.jpg) is saved with a new filename of moo.jpg.
Note: Please note that by default, size, filter, and cropping info will be concatenated to the filename to make sure the cached image is unique (this behavior can be changed using the unique setting).
original image relative path:
/images/example/cow_square.jpg
new image relative path:
/images/example/moo.jpg
array(
'max' => 300,
'filename' => 'moo',
'unique' => 'none',
'cache_dir' => ''
)
);
echo '<b>original image relative path</b>:<br>' . $ce_image->get_original_relative_path();
echo '<br><br>';
echo '<b>new image relative path</b>:<br>' . $ce_image->get_relative_path();
$ce_image->close();
filters
Filters allow you to apply one or more effects to your images.
- $params (string|array): Can be a string (if a filter with no parameters), an array (if one filter), or an array of filters (to apply multiple filters).
There are a lot of filters that can be applied. Please refer to the filters page for the available filters and details on their use.
flip
The flip setting allows you to flip your image horizontally (x-axis), vertically (y-axis), or both (x and y axes).
- $orientation (string|array): Can be 'h', 'v', or an array containing a combination of 'h' and 'v'. For example: array('h','v').
Below are some examples of the flip setting in action.

array(
'flip' => 'h'
)
);
echo $ce_image->create_original_tag() . ' ';
echo $ce_image->create_tag() . ' ';
$ce_image->close();
$ce_image->make( '/images/example/cow_square.jpg',
array(
'flip' => array( 'h', 'v' )
)
);
echo $ce_image->create_tag() . ' ';
$ce_image->close();
hash_filename
This setting allows you to hide the name of the image by using a hash as the final filename. This prevents your site users from being able to tell what the original filename was.
- $boolean (bool): Whether or not to hash the filename.
In the below example, the original image is first saved without hashing the filename (the default behavior) and then again with the filename hashed.
default image's relative path:
/images/made/images/example/cow_square_100_100.jpg
hashed image's relative path:
/images/made/images/example/a21ca003441d36f521a8cd59049b99670eeab4fe.jpg
$ce_image->make( '/images/example/cow_square.jpg',
array(
'max' => 100,
'hash_filename' => FALSE
)
);
echo '<b>default image\'s relative path</b>:<br>' . $ce_image->get_relative_path() . '<br><br>';
$ce_image->close();
//hashed
$ce_image->make( '/images/example/cow_square.jpg',
array(
'max' => 100,
'hash_filename' => TRUE
)
);
echo '<b>hashed image\'s relative path</b>:<br>' . $ce_image->get_relative_path();
$ce_image->close();
height
The maximum height you would like the image to be constrained to.
- $value (int|string): Can be a whole number, '' (blank), 0 (zero), or a percentage of the source image’s height.
In the first example below, a max height of 100px is specified. Since a max width is not specified, the image’s width is scaled proportionately to the new height (in this case, the width is automatically sized to 67px). For the second example, the image is resized as a percentage of the source image’s height.

array(
'height' => 100,
'crop' => TRUE
)
);
echo $ce_image->create_tag() . ' ';
$ce_image->close();
$ce_image->make( '/images/example/cow.jpg',
array(
'height' => '3.33%',
'crop' => TRUE
)
);
echo $ce_image->create_tag();
$ce_image->close();
hide_relative_path
This setting allows you to hide the relative path of the original file. This can be useful, if you do not want your users to the relative path of the source file.
- $value (bool): Whether or not to hide the relative path for the manipulated image.
In the below example, the first image shows the relative path (default behavior), and the second image hides the path.
Note: This option essentially places the cached image in the cache directory without creating the sub folders for the relative path. The caveat with this is that it is possible that you could accidentally have more than one file reading/saving to the same cache. Consider, for example, that you have an image at /images/example/cow.jpg and a different image with the same filename located at /other_images/cow.jpg. If you have the hide_relative_path="yes" set for both, they will both be caching to the same directory, and since they share the same filename, they will be cached to the same file! A simple workaround for this would be to specify a unique cache_dir for at least one of the images, as they would then be caching to separate locations (and still without revealing their respective original image’s relative path).
relative path with hide_relative_path set to FALSE:
/images/made/images/example/cow_square_100_100.jpg
relative path with hide_relative_path set to TRUE:
/images/made/cow_square_100_100.jpg
array(
'max' => 100,
'hide_relative_path' => FALSE
)
);
echo '<b>relative path with hide_relative_path set to FALSE</b>:<br>' . $ce_image->get_relative_path() . '<br><br>';
$ce_image->close();
$ce_image->make( '/images/example/cow_square.jpg',
array(
'max' => 100,
'hide_relative_path' => TRUE
)
);
echo '<b>relative path with hide_relative_path set to TRUE</b>:<br>' . $ce_image->get_relative_path();
$ce_image->close();
image_permissions
The mode (permission level) to try and set the created image to.
- $value (int): Must be octal. See http://php.net/manual/en/function.chmod.php for more info. Defaults to: 0644
made_regex
This setting will perform a regex search and replace on the manipulated image’s relative path string (after the image is made).
- $value (array): An associative array of key => value pairs, the keys being the pattern, and the values being the replacements.
The relative path will also be changed for the relative path used by the create_tag() method.
Here’s an example of how you could easily add a certain domain to the relative path of all of your images.
default relative path:
/images/example/cow_square.jpg
regexed relative path:
http://www.causingeffect.com/images/example/cow_square.jpg
array(
'made_regex' => array(
'^/images/' => 'http://www.causingeffect.com/images/'
)
)
);
echo '<b>default relative path</b>:<br>' . $ce_image->get_original_relative_path() . '<br><br>';
echo '<b>regexed relative path</b>:<br>' . $ce_image->get_relative_path();
$ce_image->close();
max
The maximum width and height you would like the image to be constrained to. This setting is just a shorthand way of setting the width and height settings simultaneously.
- $value (int|string): Should be a whole number, '' (blank), 0 (zero), or a percentage of the source image’s height.

array(
'max' => 100,
'crop' => TRUE
)
);
echo $ce_image->create_tag() . ' ';
$ce_image->close();
$ce_image->make( '/images/example/cow_square.jpg',
array(
'width' => 100,
'height' => 100,
'crop' => TRUE
)
);
echo $ce_image->create_tag();
$ce_image->close();
memory_limit
This setting sets the amount of memory (in megabytes) PHP can use for the script.
- $value (int): Amount of memory PHP can use for the script.
In general, the default setting of 64 should be more than adequate. However, memory consumption will vary greatly depending on the size of the manipulated images (before and after manipulation), as well as what actions and filters you are executing. Depending on your server resources, you may be able to bump this up to a higher setting (or you may need to lower it).
overwrite_cache
- $value (bool): Whether or not the cache should be overwritten.
Overwrites the cached image and will always generate a new image. This will drastically hinder performance if set to TRUE, as the image will be created each time the script is executed.
Note: This will overwrite an image cached by the CE Image. If you have another form of caching enabled (recommended), don’t forget to disable it in order for the image to be re-cached.
quality
- $value (int): The image quality, ranging from 0 (lowest) to 100 (highest).
Note: This setting has no effect if the final image is a png or a gif, as they are always saved at their respective highest qualities. However, you can convert images to jpg format dynamically using the save_type setting.
You can see in the example below that the quality of the second image is very low (10), compared to the quality of its source image (100). The advantage of setting a lower quality is reduced file size (and ultimately page loading speed). Setting a quality of 80 is often a good way to radically lower file size without drastically affecting the image’s appearance.

original filesize: 38.49 KiB
new filesize: 2.81 KiB
array(
'quality' => 10
)
);
echo $ce_image->create_original_tag() . ' ';
echo $ce_image->create_tag() . ' ';
echo '<br><b>original filesize</b>: ' . $ce_image->get_original_filesize();
echo '<br><b>new filesize</b>: ' . $ce_image->get_filesize();
$ce_image->close();
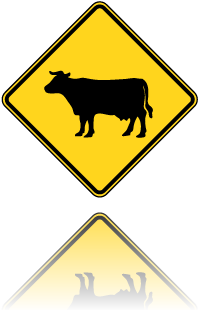
reflection
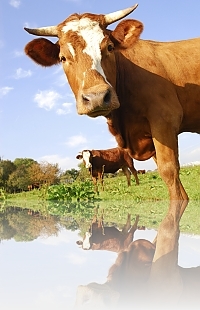
The reflection setting allows you to create a reflection for the image, otherwise known as the “wet floor effect.”
$gap_height = 0,
$start_opacity = 80,
$end_opacity = 0,
$reflection_height = '50%'
);
- $gap_height (int): The vertical space, in pixels, between the image and its reflection.
- $start_opacity (int): The opacity of the reflection at the top of the reflection. This can be any number between 0 (completely transparent) and 100 (completely opaque). The default is 80.
- $end_opacity (int): The opacity of the reflection at the bottom of the reflection. This can be any number between 0 (completely transparent) and 100 (completely opaque). The default is 0.
- $reflection_height (int|string): The height of the reflection, either in pixels, or as the percentage of the image. If specifying as a percentage string, then a % should be concatenated on the end. For example, if the made image was 100px tall, and a reflection height of '50%' was specified, then the resulting reflection would be 50px tall.
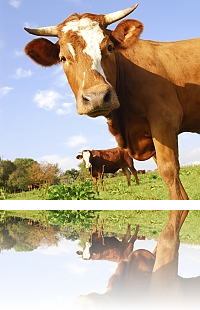
$ce_image->make( '/images/example/cow_square.jpg',
array(
'reflection' => array( 10, 100 ),
'save_type' => 'png'
)
);
echo $ce_image->create_tag() . ' ';
$ce_image->close();
//faux transparency jpg by blending image with background color
$ce_image->make( '/images/example/cow_square.jpg',
array(
'reflection' => array( 0, 80, 0, 110 ),
'bg_color' => 'f0f0f0'
)
);
echo $ce_image->create_tag() . ' ';
$ce_image->close();
//png
$ce_image->make( '/images/example/cow-sign.png',
array(
'reflection' => array( 10 )
)
);
echo $ce_image->create_tag();
$ce_image->close();
remote_cache_time
- $minutes (int): The number of minutes to wait before re-downloading remote images.
This setting allows you to override the minimum specified interval a remote image should be cached before having to re-download the image.
If you have the PHP Curl extension enabled and the remote_cache_time is set to 0, the CE Image will attempt to retrieve the last modified date of the remote image. If you set the cache time to 0 (meaning you want to check to see if a newer version of the remote image exists each time the script is run), then you should enable caching.
If the remote time is not set to 0, CE Image will wait the specified amount of minutes before re-downloading the image. If you prefer that the script never attempts to check if the remote image has changed, or to download a newer version, then please set this value to -1.
remote_dir
- $directory (string): The relative path in which the remote images should be downloaded.
PHP can only manipulate images that are on the local server. So if an image is located on another server, it must first be downloaded to your server before it is manipulated. This setting allows you to specify a cache directory for the downloaded remote images. The downloaded image will then be used to manipulate and cache your final image, using the same settings as a default image on your site.
rotate
The rotate setting allows you to rotate an image.
- $degrees (int): The degrees you would like to rotate the image.
Rotated images will appear best when rotated in 90° increments, as PHP does not antialias the edges. The bg_color setting can be used to specify the background color of space revealed by rotating the image. PHP’s native imagerotate function is used to rotate the image, which unfortunately has poor transparency support.
Note 1: Images will first be cropped/resized to the dimensions specified, and then rotation will be applied. The rotation of the image may cause the size of the resulting image dimensions to change! For example, if you rotate a portrait image 90°, the width and height dimensions would be effectively swapped. The width and height variable will represent the dimensions of the final image.
Note 2: Images being saved to png format will attempt to create transparent backgrounds for the space revealed by the rotation if no background color is set via the bg_color setting, however, transparency only seems to be supported by the more recent versions of PHP 5. If you are getting black backgrounds instead of transparency, you can set a background color via the bg_color setting to be used instead. Transparency for images being saved to the gif format does not appear to be supported in any version of PHP 5 that we tested, although you can specify a background color via the bg_color setting.
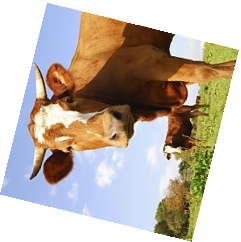
Below are some rotation examples.
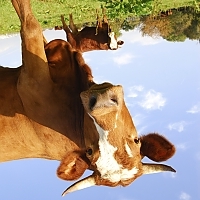

array(
'rotate' => 180,
'bg_color' => 'f0f0f0'
)
);
//the original
echo $ce_image->create_original_tag() . ' ';
//180
echo $ce_image->create_tag() . ' ';
$ce_image->close();
//270
$ce_image->make( '/images/example/cow_square.jpg',
array(
'rotate' => 270,
'bg_color' => 'f0f0f0'
)
);
echo $ce_image->create_tag() . ' ';
$ce_image->close();
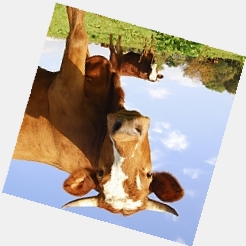
//436
$ce_image->make( '/images/example/cow_square.jpg',
array(
'rotate' => 436,
'save_type' => 'png'
)
);
echo $ce_image->create_tag() . ' ';
$ce_image->close();
//-196
$ce_image->make( '/images/example/cow_square.jpg',
array(
'rotate' => -196,
'bg_color' => 'f0f0f0'
)
);
echo $ce_image->create_tag() . ' ';
$ce_image->close();
rounded_corners
The rounded_corners setting allows you to round one or more corners to a certain radius with antialiasing. If you are saving to png format, you can also have the corners be completely transparent. Rounded corners are applied after all resizing, filters, and watermarking has been completed.
$corner_array = array(
$corner_identifier,
$radius = 15,
$color = ''
)//[, $corner2_array, $corner3_array, etc]
)
- $corner_identifier (string): This index can have a value of any one of the following: all,tl,tr,bl,br. If 'all' is used, it will set the preferences for each of the corners.
- $radius (int): The radius of the corner. If this is set to 0, the corner will not be rounded.
- $color (string): Can be left blank to indicate transparency or can be set to 3 or 6 digit hexadecimal number (with or without the #).
You can specify any number of corners, each with their own radius and color information. Corners specified later take precedence over previously specified ones.
Note 1: Transparency for rounded corners is not supported for images being saved to the gif format. If a color is not specified, there will not be a noticeable difference to the image. You can, however, specify opaque colors.
Note 2: If you just have one corner array you want to pass in, you don't need to wrap it in an outer array (as seen in the first and second examples below).
Below are some examples of the flexibility of the rounded_corners setting. Some of the effects are extreme just to illustrate the setting’s capabilities.


$ce_image->make( '/images/example/cow_square.jpg',
array(
'rounded_corners' => array( 'all' ),
'bg_color' => 'f0f0f0'
)
);
echo $ce_image->create_tag() . ' ';
$ce_image->close();
//top center example
$ce_image->make( '/images/example/cow_square.jpg',
array(
'rounded_corners' => array( 'bl', 100 ),
'save_type' => 'png'
)
);
echo $ce_image->create_tag() . ' ';
$ce_image->close();
//top right example
$ce_image->make( '/images/example/cow_square.jpg',
array(
'rounded_corners' => array(
array( 'all', 50 ),
array( 'tr', 0 ),
array( 'bl', 0 )
),
'save_type' => 'png'
)
);
echo $ce_image->create_tag() . ' ';
$ce_image->close();
//bottom left example
$ce_image->make( '/images/example/cow_square.jpg',
array(
'rounded_corners' => array(
array( 'all', 60 ),
array( 'tl', 0 )
),
'save_type' => 'png'
)
);
echo $ce_image->create_tag() . ' ';
$ce_image->close();
//bottom center example
$ce_image->make( '/images/example/cow_square.jpg',
array(
'rounded_corners' => array(
array( 'tr', 100, 'be0b03' ),
array( 'br', 100, 'eacd12' ),
array( 'bl', 100, 'f0f0f0' ),
array( 'tl', 100, '4491d4' )
)
)
);
echo $ce_image->create_tag() . ' ';
$ce_image->close();
//bottom right example
$ce_image->make( '/images/example/cow_square.jpg',
array(
'rounded_corners' => array(
array( 'tr', 100, 'be0b03' ),
array( 'br', 150, 'eacd12' ),
array( 'bl', 200, '1c9a3c' ),
array( 'tl', 50, '4491d4')
)
)
);
echo $ce_image->create_tag() . ' ';
$ce_image->close();
save_type
The image type you would like to save the image as. You can easily convert an image of one type to a different image type by specifying this setting.
- $format (string): Simply do not include this setting or leave it the blank ('') to save as the same image type of the original image. You can also specify the save type as one of the following: 'png', 'jpg', 'jpeg', 'gif' (not case sensitive).
In the example below, the first image is a jpg being saved as a png, and the second image is a png being saved as a gif (notice the chunky gif look).

$ce_image->make( '/images/example/cow_square.jpg',
array(
'save_type' => 'png'
)
);
echo $ce_image->create_tag() . ' ';
$ce_image->close();
//png to gif
$ce_image->make( '/images/example/cow-sign.png',
array(
'save_type' => 'gif'
)
);
echo $ce_image->create_tag();
$ce_image->close();
src_regex
This setting will perform a regex search and replace on the whatever is passed in for the image’s source.
- $value (array): An associative array of key => value pairs, the keys being the pattern, and the values being the replacements.
This setting can be really useful if working with images from different domains on the same server. For example, if you are working on http://www.example.com, and you want to pull images from http://www.causingeffect.com (which, for the sake of this example, is hosted on the same server), you could replace the domain with the server path. That way, CE Image would not need to download the images as “remote images.”
'^http://www.causingeffect.com/' => '/server/path/to/causingeffect.com/public/'
)
In order to make the above example work, you may need to toy around with your open_basedir settings, which falls far outside of the scope of CE Image…
text
Adds text to the manipulated image.
$the_text = '',
$minimum_dimensions = array( 0, 0 ),
$font_size = 12,
$line_height = '125%',
$font_color = 'fff',
$font_src = 'heros-bold.ttf',
$text_align = 'center',
$width_adjustment = 0,
$position array( 'center', 'center' ),
$offset = array( 0, 0 ),
$opacity = 100,
$shadow_color = '000',
$shadow_offset = array( 1, 1 ),
$shadow_opacity = 50
)
- $the_text (string): The text to add to the image. HTML entities will automatically be converted to their text equivalents.
- $minimum_dimensions (array): This is a pair of comma separated integers that specify the minimum width and height dimensions needed for the text to appear. The default for this sub-parameter is 0,0 (representing minimum_width,minimum_height respectively). Setting a dimensions to 0 (zero) means that there is no minimum (since the default value is 0,0, the text will always appear by default). If the manipulated image has dimensions that are less than one or both of the dimensions specified, and are not set to zero, then the text will not appear.
- $font_size (int): The text font size. The default is 12.
- $line_height (int|string): The line height. This can be an integer (to specify the pixel value, eg: 15), or a percentage of the font_size (eg: 120%). The default is 125%. Similar to CSS, this value can be used to set the text leading.
- $font_color (string): The text color. Can be a 3 or 6 digit hexadecimal number (with or without the #). The default is #ffffff.
- $font_src (string): The TrueType font (.ttf) file to use for the font. This can be a full server path, the font filename if the font is in the ../ce_img/fonts/ directory (there are 33 font files in there that come packaged with CE Image), or a relative path to your web root directory. If the specified font cannot be found, or if none is provided, then the default font heros-bold.ttf will be used.
- $text_align (array): The way the text should align. The options are: 'left', 'center', or 'right'. The default is 'center'.
- $width_adjustment (int): An integer to adjust the width by. By default, the line width for the text will be the manipulated image’s width. You may, however, want to adjust the width. For example, if the image’s width is 160px, but you only want the line width to be 140px, you would specify a value of -20. The default value is 0.
- $position (array): This parameter will position the block of text in relation to the image. This can be specified as a pair of positions in the form of horizontal_position_string,vertical_position_string. The accepted values for the horizontal position string are: 'left', 'center', or 'right'. The accepted values for the vertical position string are: 'top', 'center', or 'bottom'. The default position pair is 'center','center'.
- $offset (array): The offset of the text after it is positioned in the form offset_x,offset_y. For example, if 'right','bottom' is specified for the $position, you may want to provide an offset of -10,-10 to move the text 10px to the left and 10px up so the text is not placed so snug to the edges. The default offset is 0,0.
- $opacity (int): The transparency of the text, ranging from 0 (completely transparent) to 100 (completely opaque). Defaults to 100.
- $shadow_color (string): The shadow text color. Can be a 3 or 6 digit hexadecimal number (with or without the #). The default is #000000. If not specified to a valid hexadecimal color value, the shadow text will not be applied.
- $shadow_offset (array): The offset of the shadow text (in pixels), in the form shadow_offset_x,shadow_offset_y. The default shadow offset is 1,1.
- $shadow_opacity (int): The transparency of the shadow text, ranging from 0 (completely transparent) to 100 (completely opaque). Defaults to 50.
The following are some examples of the text setting in action:
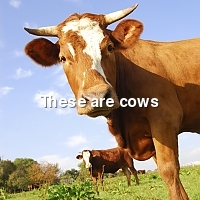

$ce_image->make( '/images/example/cow_square.jpg',
array(
'text' => array( 'These are cows' )
)
);
echo $ce_image->create_tag() . ' ';
$ce_image->close();
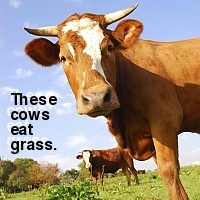
//adjusted, position, color, and shadow
$ce_image->make( '/images/example/cow_square.jpg',
array(
'text' => array(
'These cows eat grass.',
array( 200, 200 ),
12,
'125%',
'#000',
'heros-bold.ttf',
'left',
-150,
array( 'left', 'center' ),
array( 10, 20 ),
100,
'fff',
array( -4, -4 ),
80
)
)
);
echo $ce_image->create_tag() . ' ';
$ce_image->close();
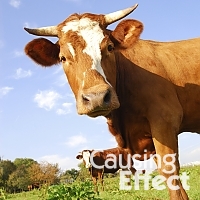
//adjusted position and font
$ce_image->make( '/images/example/cow_square.jpg',
array(
'text' => array(
'“Cows”',
array( 0, 0 ),
12,
'125%',
'#fff',
'bonum-bold.ttf',
'center',
-20,
array( 'center', 'bottom' ),
array( 0, -10 )
)
)
);
echo $ce_image->create_tag() . ' ';
$ce_image->close();
One of the inherit difficulties of using dynamic text is ensuring that the size of the image is not too small for the text to fit. This can be especially problematic if the images are submitted by users or clients that are not tech savvy. The minimum_dimensions parameter helps to mitigate this problem, however “all or nothin’” didn’t seem good enough, so we added the ability to waterfall settings for different dimensions. You can pass in multiple text setting arrays, and the first configuration option that meets the dimension limitations will be used. You can see this settings “waterfall” in action in the example below:


$text_settings = array(
array(
'Copyright 2011',
array( 200, 200 ), //shows if >= 200px wide & >= 200px tall
12,
'125%',
'#fff',
'heros-bold.ttf',
'center',
0,
array( 'center', 'bottom' ),
array( 0, -10 ),
80,
'-'
),
array(
'© 2011',
array( 100, 100 ), //shows if >= 100px wide & >= 100px tall
10,
'125%',
'#fff',
'heros-bold.ttf',
'center',
0,
array( 'center', 'bottom' ),
array( 0, -5 ),
80,
'-'
)
);
//The 200 by 200 minimum dimensions setting will be used
$ce_image->make( '/images/example/cow_square.jpg',
array(
'text' => $text_settings
)
);
echo $ce_image->create_tag() . ' ';
$ce_image->close();
//The 100 by 100 minimum dimensions setting will be used
$ce_image->make( '/images/example/cow_square.jpg',
array(
'max' => 100,
'text' => $text_settings
)
);
echo $ce_image->create_tag() . ' ';
$ce_image->close();
unique
Determines in which way the saved manipulated images will be unique.
- $value (string): The options for this setting are 'filename', 'directory_name', and 'none'.
When an image is manipulated, a unique data string is generated that reflects the actions that were done to the image. This string is used to ensure the manipulated image is cached to a unique file that reflects the actions that were applied to it.
The "filename" option is default, and means the unique string will be added to the filename.
The "directory_name" option creates a folder using the string, and places the manipulated image (with the original filename), inside the folder, thereby preserving the image name.
And finally, the "none" option will not change the filename or create a special folder. Setting this value to "none", is not recommended, as it increases the risk of different manipulations of the same image being cached to the same file, causing unexpected results (unless specifying a filename and/or unique cache directory).
Note: If the image was not manipulated, then the original (source) image will generally be returned. There are some exceptions, like if the original image is below web root, it will be created and cached according to your settings.
"filename" relative path:
/images/made/images/example/cow_square_100_100.jpg
"directory_name" relative path:
/images/made/images/example/100_100/cow_square.jpg
"none" relative path:
/images/made/images/example/cow_square.jpg
$ce_image->make( '/images/example/cow_square.jpg',
array( 'unique' => 'filename', 'max' => 100 )
);
echo '<b>"filename" relative path</b>:<br>' . $ce_image->get_relative_path();
$ce_image->close();
echo '<br><br>';
//directory_name
$ce_image->make( '/images/example/cow_square.jpg',
array( 'unique' => 'directory_name', 'max' => 100 )
);
echo '<b>"directory_name" relative path</b>:<br>' . $ce_image->get_relative_path();
$ce_image->close();
echo '<br><br>';
//default cache behavior
$ce_image->make( '/images/example/cow_square.jpg',
array( 'unique' => 'none', 'max' => 100 )
);
echo '<b>"none" relative path</b>:<br>' . $ce_image->get_relative_path();
$ce_image->close();
watermark
Enables a watermark to be added to the manipulated image.
$watermark_src = '',
$minimum_dimensions = array( 0, 0 ),
$opacity = 100,
$position = array( 'center', 'center' ),
$offset = array( 0, 0 )
)
- $watermark_src (string): This is a relative path to the image to be used as the watermark.
- $minimum_dimensions (array): This is a pair of comma separated integers that specify the minimum width and height dimensions needed for the watermark to appear. The default is array(0,0) (representing minimum_width,minimum_height respectively). Setting a dimensions to 0 (zero) means that there is no minimum (since the default is array(0,0), the watermark will always appear). If the manipulated image has dimensions that are less than one or both of the dimensions specified, and are not set to zero, then the watermark will not appear.
- $opacity (int): The transparency of the watermark, ranging from 0 (completely transparent) to 100 (completely opaque).
- $position (array|string): This allows you to specify the position of the watermark. There are two ways to do this:
- standard: This is the way to position the watermark in the traditional sense, without repeating it. The position can be specified as a pair of positions in the form of array($horizontal_position_string,$vertical_position_string). The accepted values for the horizontal position string are: left, center, or right. The accepted values for the vertical position string are: top, center, or bottom. The default position pair is center,center.
- repeat: If you want your image to repeat (tile), you can enter array('repeat',$row_offset_percentage), where $row_offset_percentage is a number between 0 and 100 that represents the percentage of the offset of the current repeating row, in relation to the previous row. If you don’t include the $row_offset_percentage and simply specify the string 'repeat', a default $row_offset_percentage of 50 will be used. The watermark will simply tile, with every other row offset by the specified percentage (which defaults to 50% if no offset is provided).
- $offset (array): The offset of the watermark after it is positioned in the form array($offset_x,$offset_y). For example, if array('right','bottom') is specified for the position, you may want to provide an offset of array(-10,-10) to move the watermark 10px to the left and 10px up so that it is not placed so snug to the edges. The default offset is array(0,0).
- $blend (string): The blend mode affords you the ability to blend the watermark with the image. Currently, there is only one blend mode: 'multiply'. If this option is not specified, or left blank, then no blend mode will be applied.
This is a simple example of a watermark:
array(
'watermark' => array(
'/images/watermarks/logo_sm2.png', //source
array( 140, 60 ), //minimum dimensions
80, //opacity
array( 'right', 'bottom' ), //position
array( -10, -10 ) //offset
)
)
);
echo $ce_image->create_tag() . ' ';
$ce_image->close();
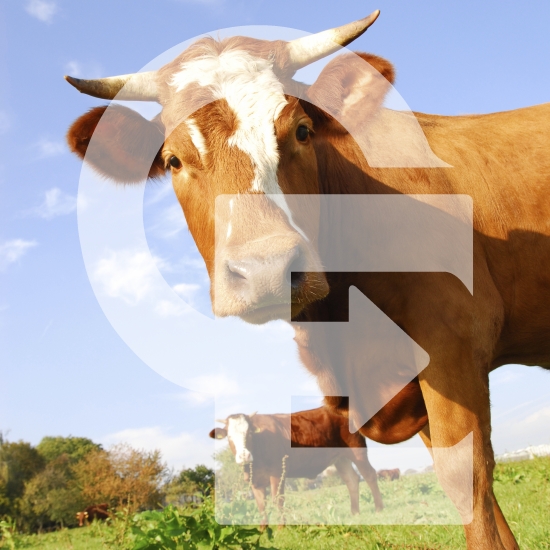
The following is a blend mode example. The first image has not been manipulated, the second image has the sobel_edgify filter applied, and the third image uses the second image as a watermark for the first image with the multiply blend mode applied.


array(
'filters' => array(
array( 'sobel_edgify', 60, '000', 'fff' ),
array( 'opacity', 80 )
)
)
);
echo $ce_image->create_original_tag() . ' '; //original
echo $ce_image->create_tag() . ' '; //manipulated
//assign the manipulated image path to a variable
$watermark = $ce_image->get_relative_path();
$ce_image->close();
//create the blended image
$ce_image->make( '/images/example/cow_square.jpg',
array(
'watermark' => array(
$watermark,
array( 0, 0 ),
100,
array( 'left', 'top' ),
array( 0, 0 ),
'multiply'
)
)
);
echo $ce_image->create_tag() . ' '; //blended
$ce_image->close();
This example shows tiling a watermark image and applying a multiply blend mode to it. The first one shows a repeating pattern watermark (at 75% opacity) without a blend mode and the second shows the same pattern watermark (also at 75% opacity) with the multiply blend mode applied.


$ce_image->make( '/images/example/cow_square.jpg',
array(
'watermark' => array(
'/images/watermarks/plaid.png',
array( 0, 0 ),
75,
array( 'repeat', 0 ),
array( 0, 0 )
)
)
);
echo $ce_image->create_tag() . ' ';
$ce_image->close();
//multiply blending
$ce_image->make( '/images/example/cow_square.jpg',
array(
'watermark' => array(
'/images/watermarks/plaid.png',
array( 0, 0 ),
75,
array( 'repeat', 0 ),
array( 0, 0 ),
'multiply'
)
)
);
echo $ce_image->create_tag() . ' ';
$ce_image->close();
One of the inherit difficulties of using dynamic watermarks is ensuring that the size of the final image is not too small for the watermark. This can be especially problematic if the images are submitted by users or clients that are not tech savvy. The $minimum_dimensions setting helps to mitigate this problem, however “all or nothin’” didn’t seem good enough, so we added the ability to waterfall watermarks for different dimensions! You can pass in multiple configuration options. The first configuration option that meets the dimension limitations will be used.
Here is an example of what we like to call “the watermark waterfall.” As you can see below, multiple watermark settings can be specified for various sizes. The first watermark configuration that works for the dimensions is used.


$watermark = array(
array(
'/images/watermarks/logo_lg1.png',
array( 420, 520 ),
50
),
array(
'/images/watermarks/logo_sm2.png',
array( 310, 310 ),
80,
array( 'right', 'bottom' ),
array( -10,-10 )
),
array(
'/images/watermarks/logo_sm2.png',
array( 300, 300 ),
30,
'repeat',
array( 30, 30 )
),
array(
'/images/watermarks/logo_sm1.png',
array( 0, 0 ),
50,
'repeat',
array( 5, 5 )
)
);
//first
$ce_image->make( '/images/example/cow.jpg',
array(
'watermark' => $watermark,
'max' => 550,
'crop' => TRUE
)
);
echo '<p>' . $ce_image->create_tag() . '</p>';
$ce_image->close();
//second
$ce_image->make( '/images/example/cow.jpg',
array(
'watermark' => $watermark,
'max' => 400,
'crop' => TRUE
)
);
echo '<p>' . $ce_image->create_tag() . '</p>';
$ce_image->close();
//third
$ce_image->make( '/images/example/cow.jpg',
array(
'watermark' => $watermark,
'max' => 300,
'crop' => TRUE
)
);
echo '<p>' . $ce_image->create_tag() . '</p>';
$ce_image->close();
//fourth
$ce_image->make( '/images/example/cow.jpg',
array(
'watermark' => $watermark,
'max' => 200,
'crop' => TRUE
)
);
echo '<p>' . $ce_image->create_tag() . '</p>';
$ce_image->close();
width
The maximum width you would like the image to be constrained to.
- $value (int|string): Can be a whole number, '' (blank), 0 (zero), or a percentage of the source image’s width.
In the first example below, a max width of 100px is specified. Since a max height is not specified, the image’s height is scaled proportionately to the new width (in this case, the height is automatically made to 149px). For the second example, the image is resized as a percentage of the source image’s width.

array(
'width' => 100,
'crop' => TRUE
)
);
echo $ce_image->create_tag() . ' ';
$ce_image->close();
$ce_image->make( '/images/example/cow.jpg',
array(
'width' => '5%',
'crop' => TRUE
)
);
echo $ce_image->create_tag();
$ce_image->close();